Installing and configuring vSphere Replication 6.x in VMware environment.
Most of you would be aware from vR 5.8 deployment can only be performed using the web client. Currently we would go through step by step procedure on deploying vR 6.x.
The vSphere Replication appliance registers as an extension with the corresponding vCenter Server instance. Only one vSphere Replication appliance is allowed per vCenter Server.
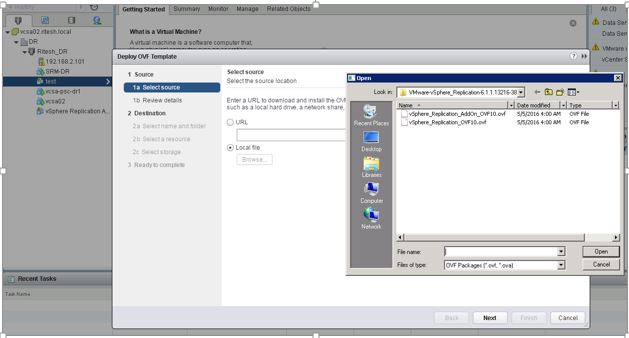
You can download the vsphere replication appliance as an OVF from the my Vmware portal.
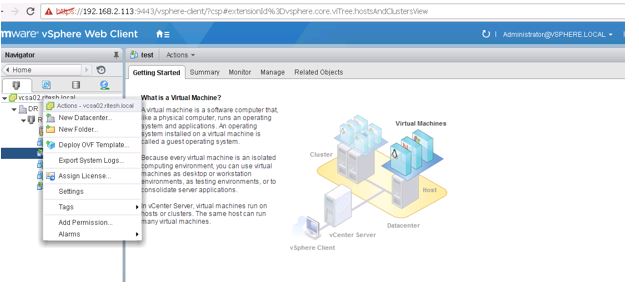
Once web client has been logged in using required administrative privileges, right click on vCenter and select Deploy OVF Template.
Select the actual OVF file and not the addon and Click Open
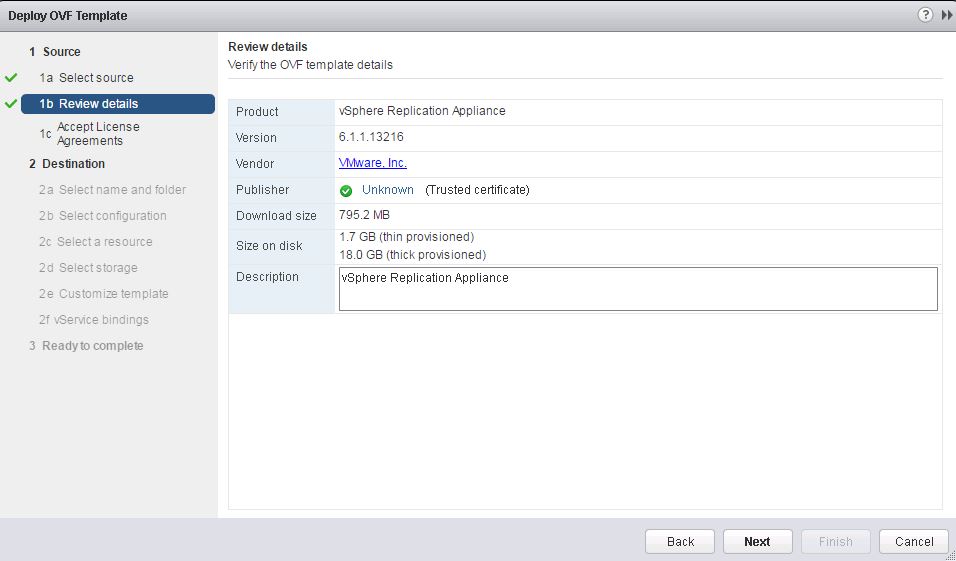
Verify the version and hit Next.
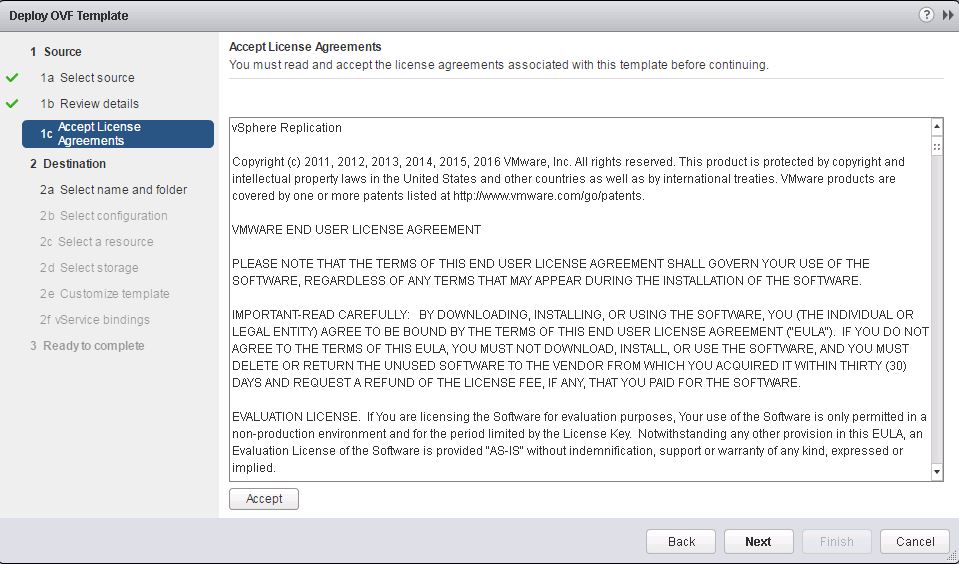
Accept the license agreement and click next.
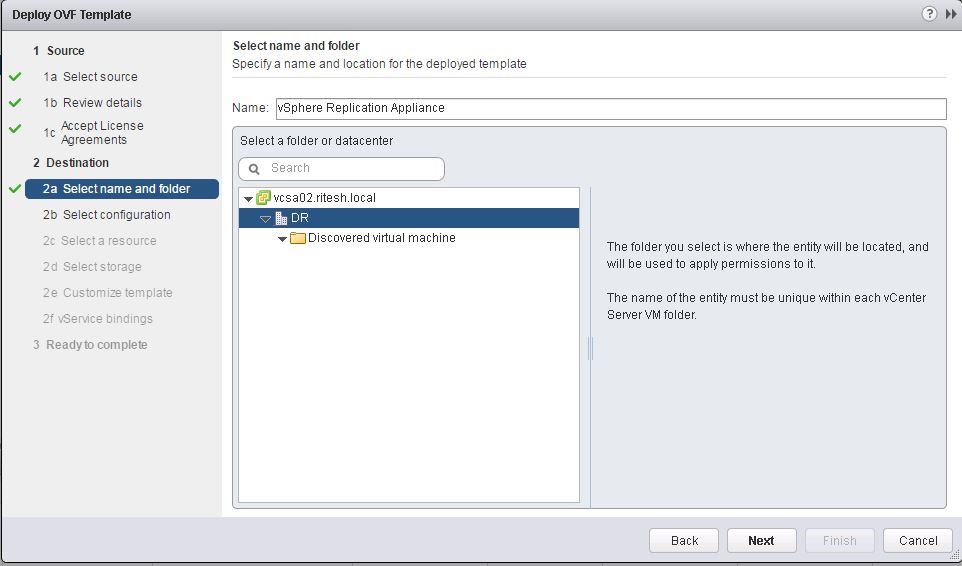
Select the location where you need to place the appliance and hit Next.
Select the default configuration and click Next.

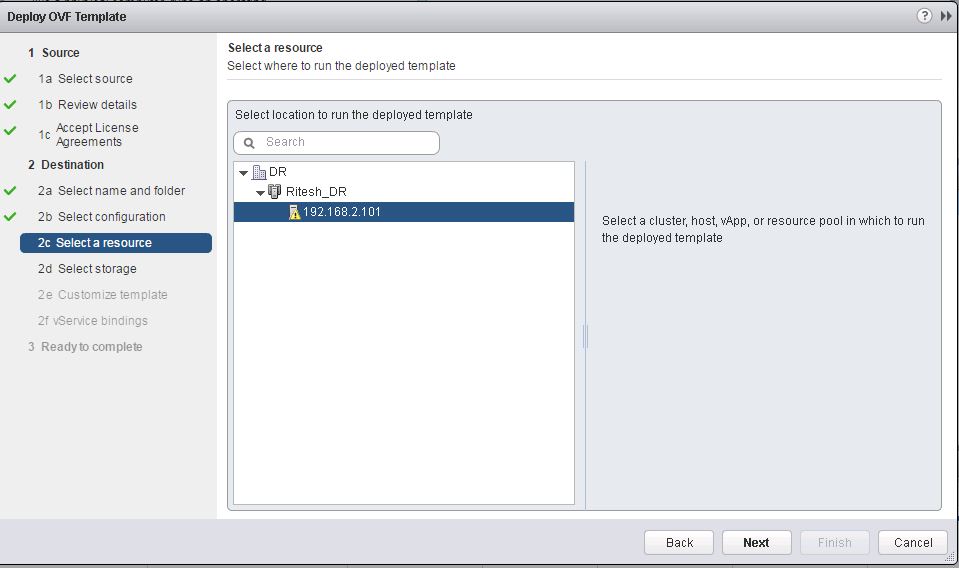
Locate the ESXI host where vR would be registered post deployment.
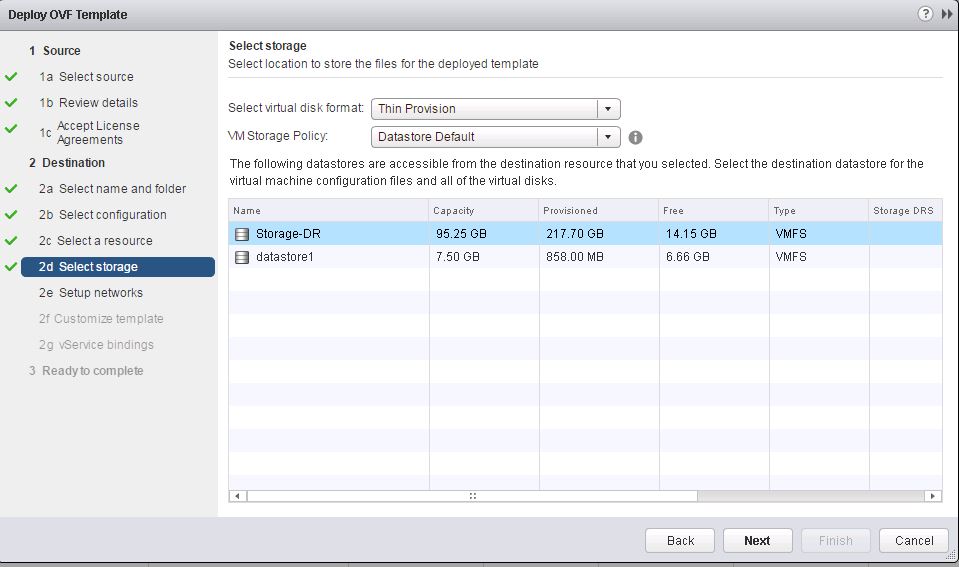
Select the datastore with sufficient storage space and proceed further. Click Next.
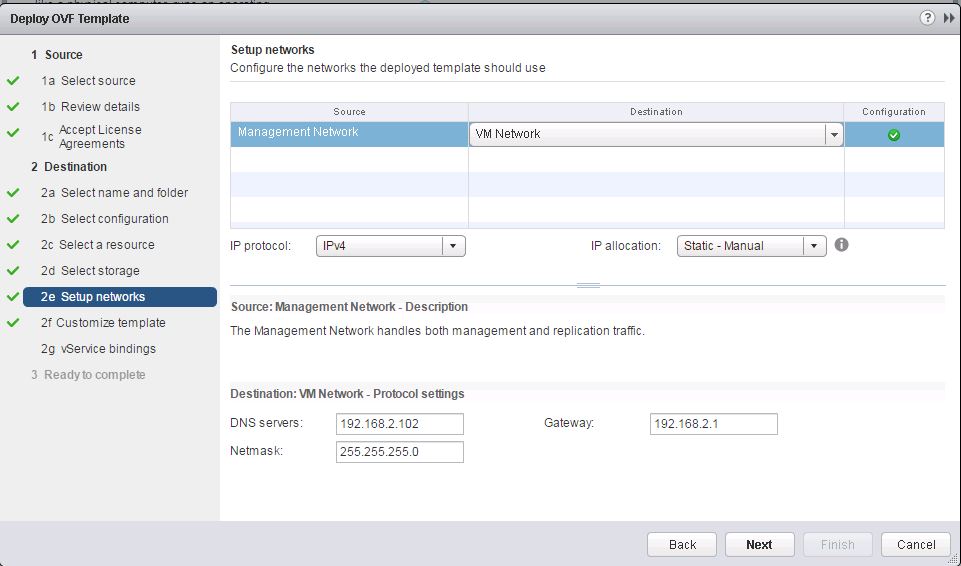
Provide the network related information such as DNS,IP allocation(Manual/DHCP) and Management network(vlan) and click next once required information is provided.
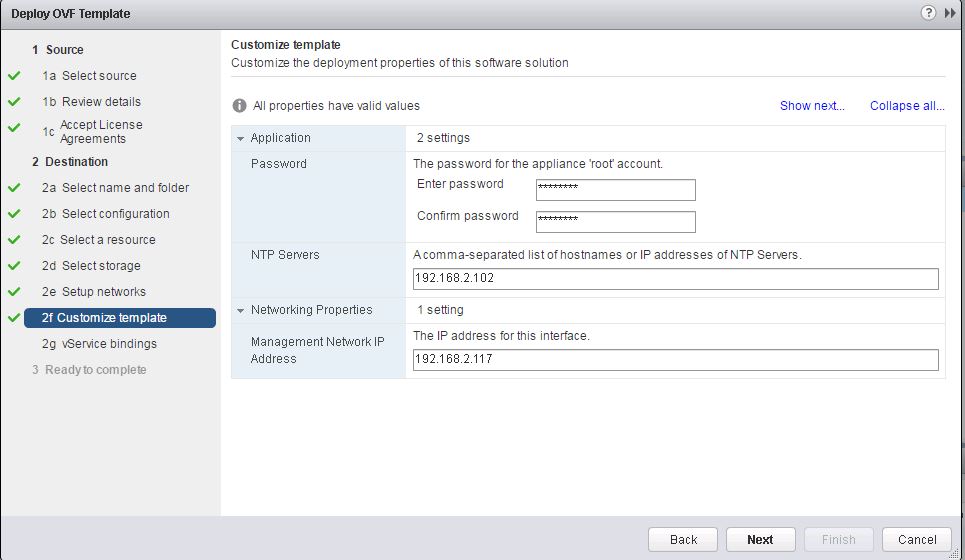
Provide the credentials to authenticate in the future from OS perspective along with system IP address.
In the below scenario Management Network IP Address refers to the current vR IP you want to assign.
Click Next.
Note:This credential would be valid to logon via VAMI page for further configurations.
Review all the information and proceed with the check mark “Power on after deployement”
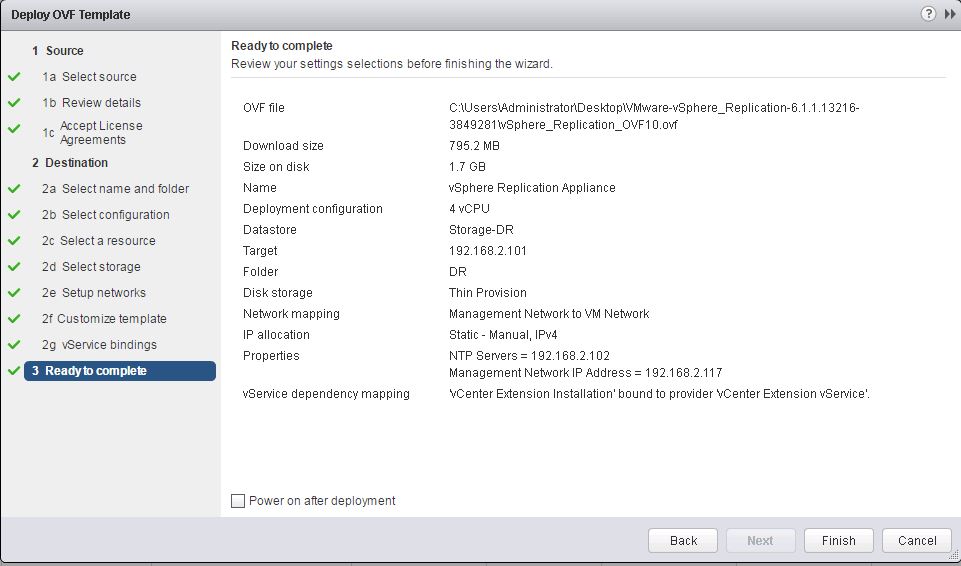
Click Finish

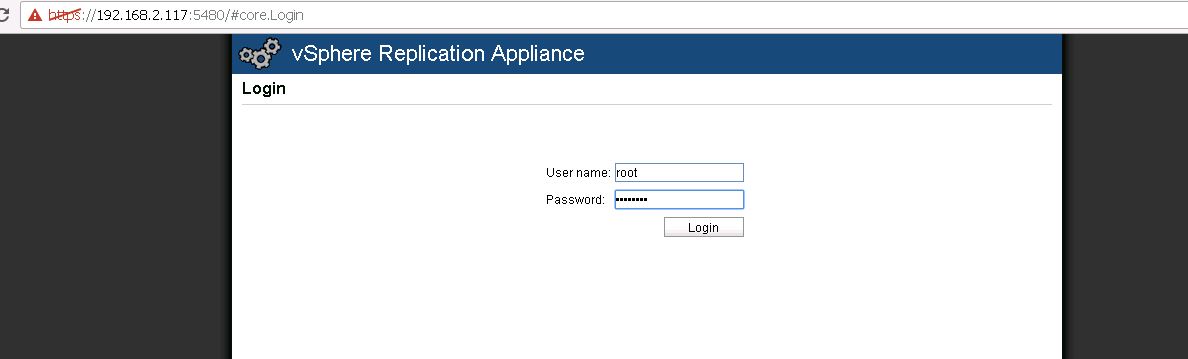
Once deployment is completed as per below image proceed with accessing the VAMI page for further configuration.
https://VR_IP:5480 in the current eg https://192.168.2.117:5480
Login using the root credentials.
GoTo VR–>Configuration Tab
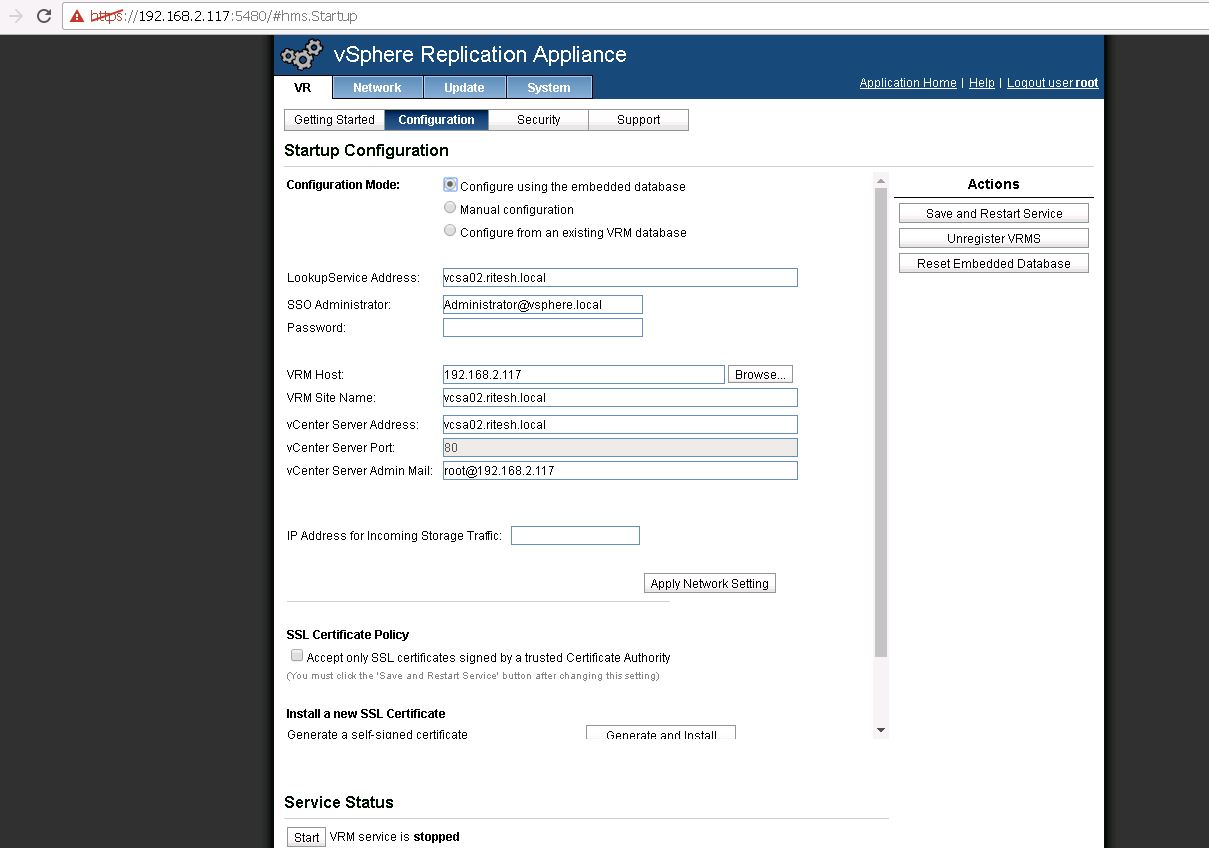
In the lookupService Address by default you would be witnessing vCenter IP. Change it to PSC IP address if vCenter is pointing towards a external PSC. if embedded, IP of vCenter would be used.
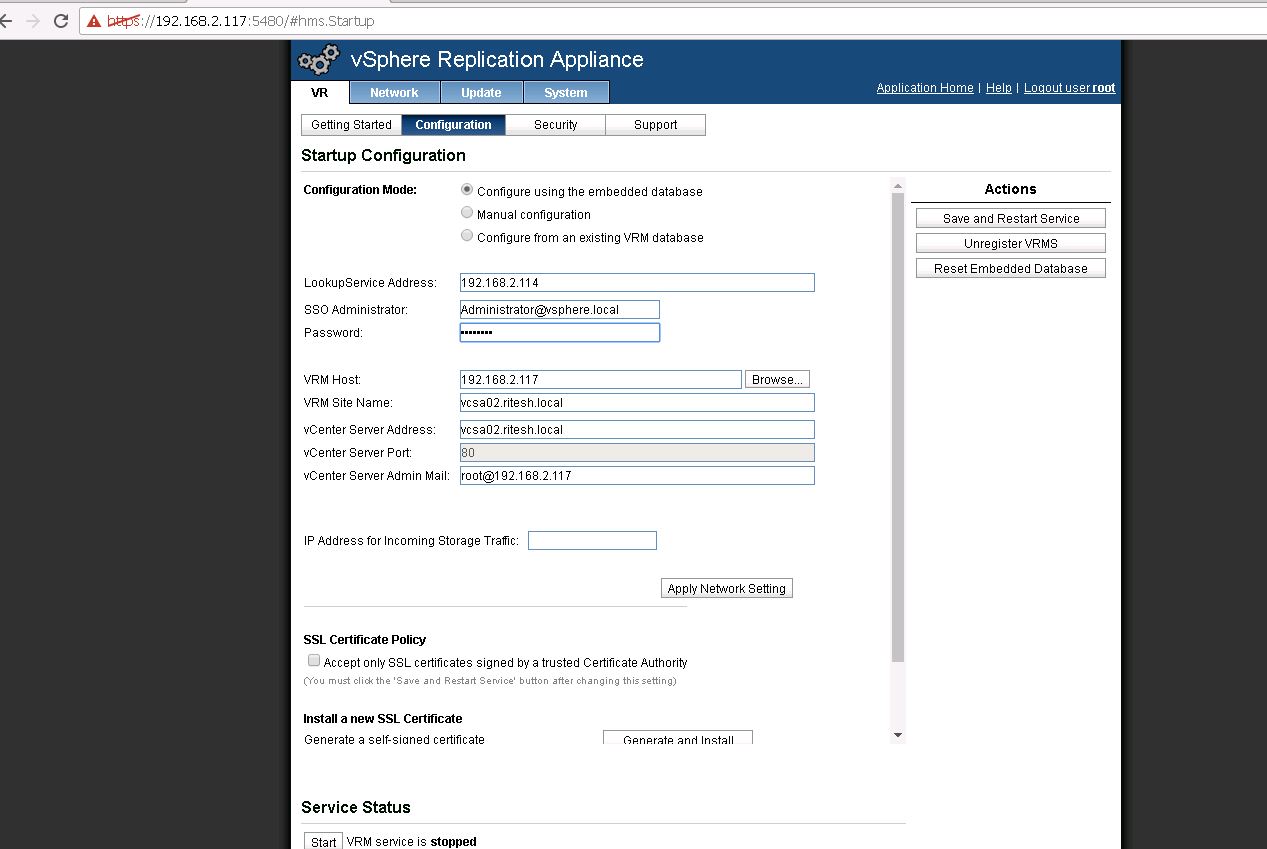
Enter SSO credentials and click Save and Restart Service.
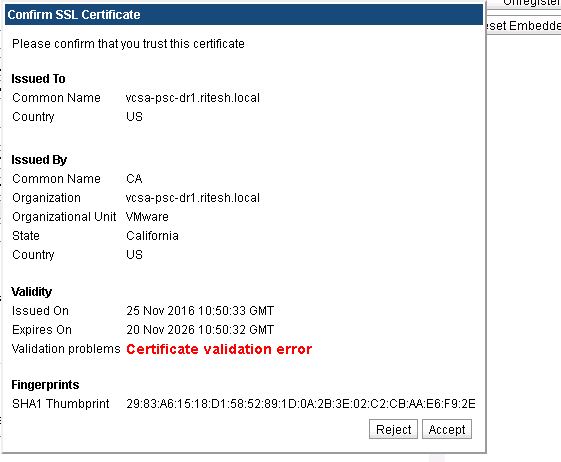
You will be prompted to accept the thumbprint from PSC. Click Accept.
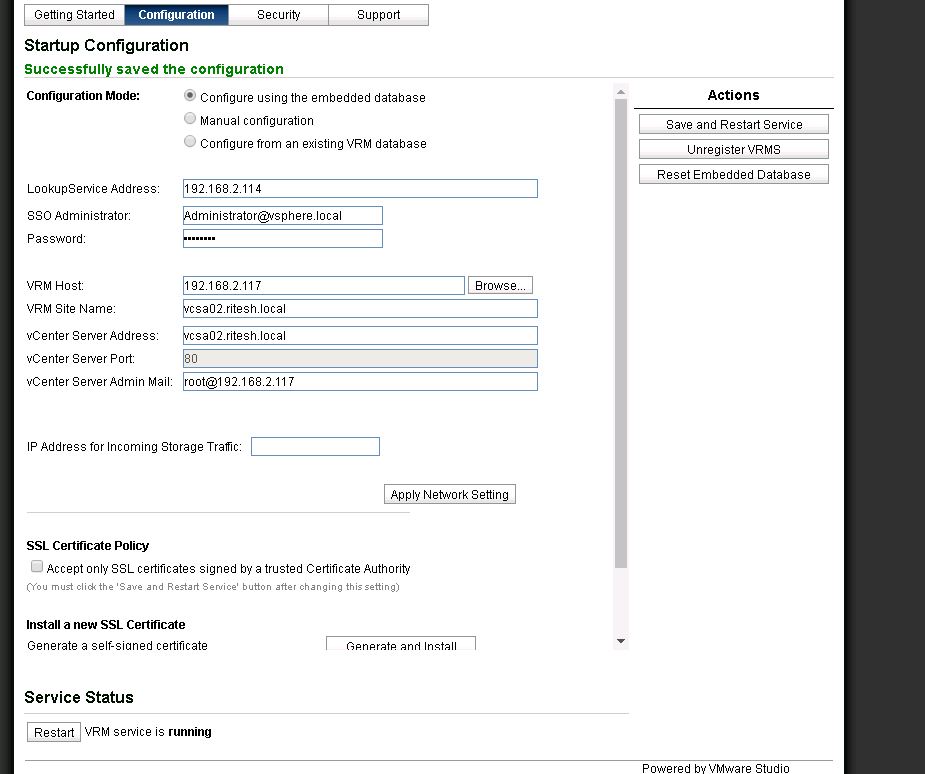
You could see a below message stating successfully saved the configuration. At the bottom end vR service would be running.
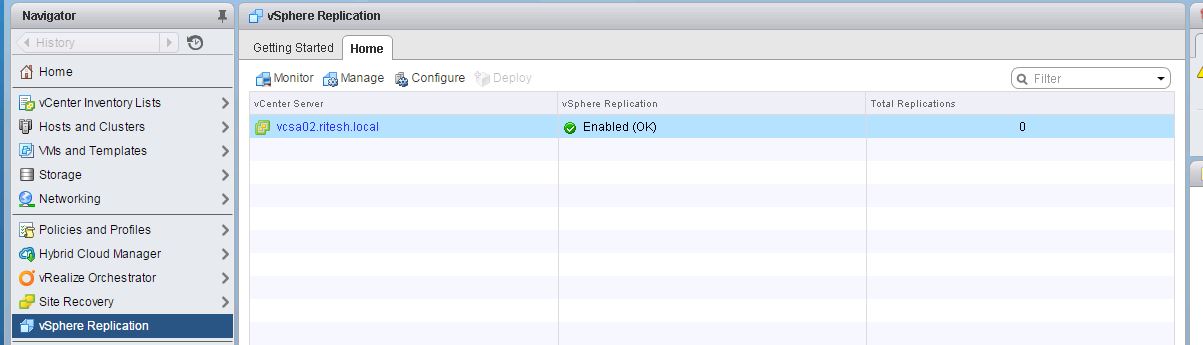
Login to the web client to validate if vR is working fine as expected.
Below screenshot shows the vR is enabled(OK) which determines the VR is successfully configured.
Note: Always use same build of vCenter across sites and validate if downloaded vR is compatible.
vR by default has postgres DB inbuilt. You could even proceed using oracle DB.
Hope this article was helpful. Watch out for more.
Very helpful.