Migrating windows vCenter 5.5 to vCenter 6.0 appliance using migration tool
Today we would go step by step to upgrade windows vCenter 5.5 to vCenter 6.0 appliance using the migration tool.
You can find the below link to download the ISO.
https://my.vmware.com/web/vmware/details?downloadGroup=VC60U2M&productId=491&rPId=12374
Before proceeding further ensure you have verified the FAQs
https://blogs.vmware.com/vsphere/2016/09/vcenter-server-migration-tool-vsphere-6-0-update-2m.html
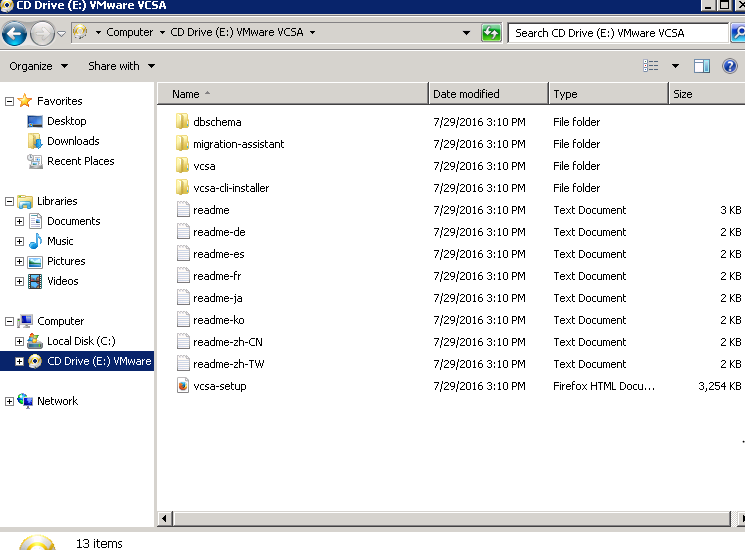
Mount the ISO to a windows server .
![]()
Ensure you do not run the actual migration from vCenter itself since the windows vCenter 5.5 would be shut down during migration process
Once mounted you would be able to see a folder named migrant assistant. Copy the folder to your windows vCenter 5.5 directly or via network share.
Once folder has been copied to the vCenter server you need to run Vmware-Migration-Assistant from the source vCenter Server.
Enter the SSO/administrator@vsphere.local password

Now it would run the pre-checks to validate the compatibility before you could proceed further with the migration.

Once pre-checks have been completed it would pop up below output stating “Waiting for migration to start”
Run the vcsa-setup on a different machine from where migration has been planned.
If client integration plugin is installed you would receive below command in order to choose the application and allow using the plugin on the operating system. In case plugin is not installed it will automatically download the vSphere client integration. Install the plugin, Close the browser and reopen it .
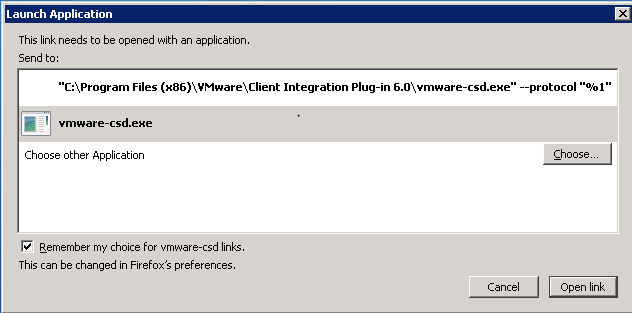
Note:Chrome and internet explorer at times do not detect the plugin. I would recommend to use firefox.
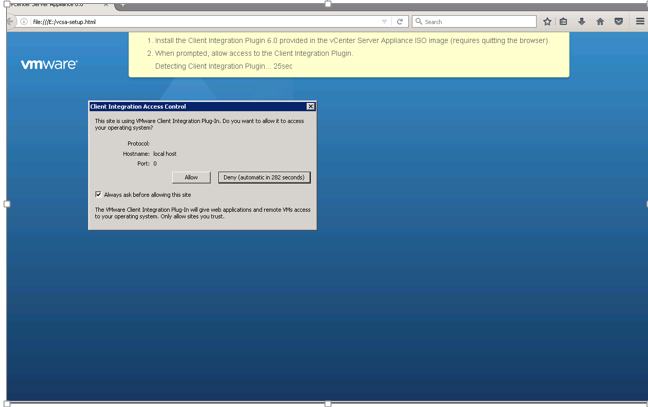
Click on Allow
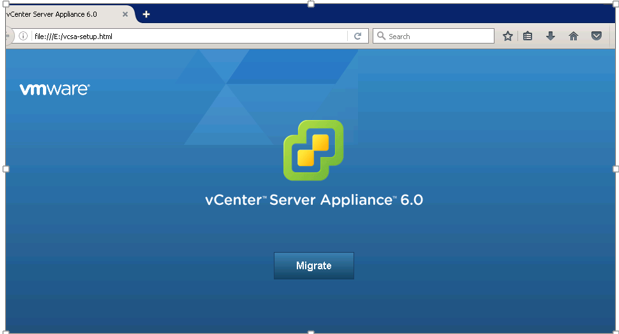
Click on Migrate
Read the below note and proceed further. Click on Yes.

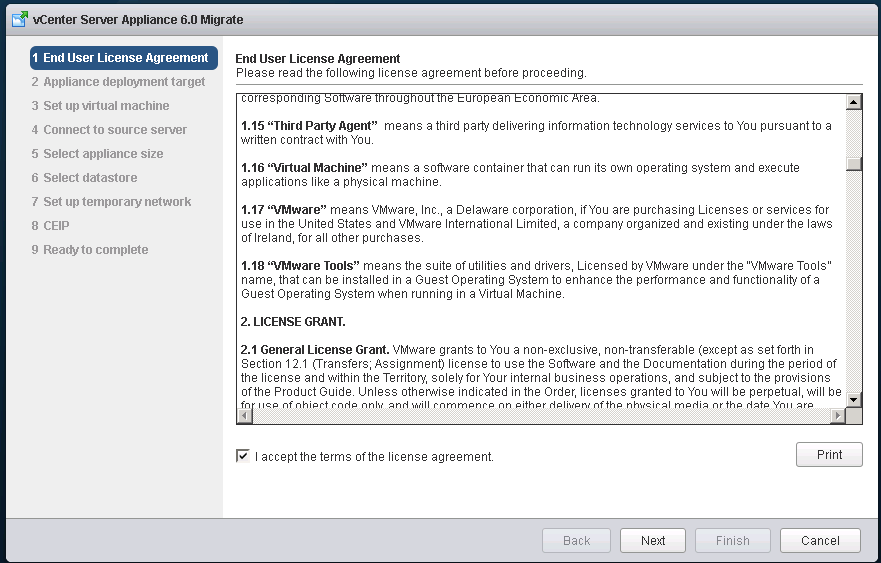
Accept the agreement and click on Next.
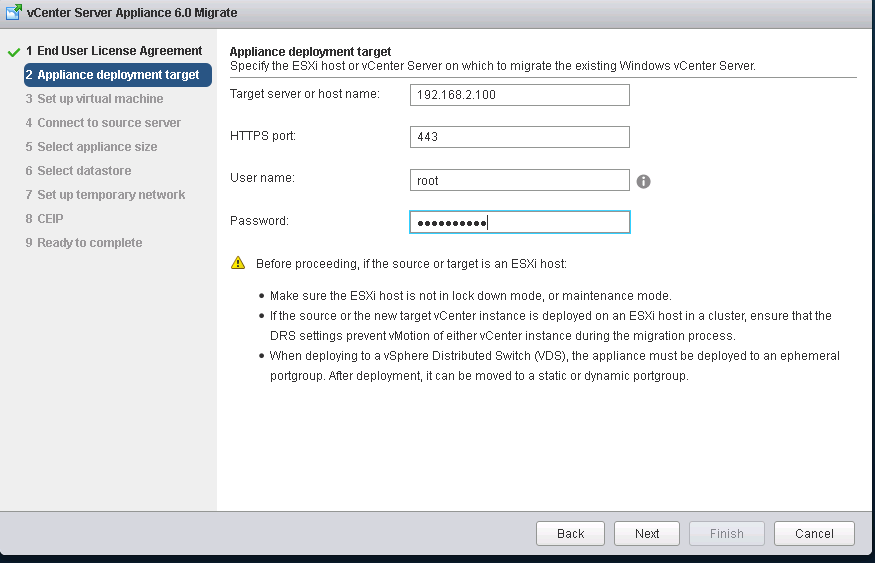
Provide the ESXI host name or vCenter based on where you need to VM to be registered along with the root credentials of the underlying ESXI/vCenter. Click Next.
Cick on Yes.

Provide the appliance name along with root credentials you need to set.

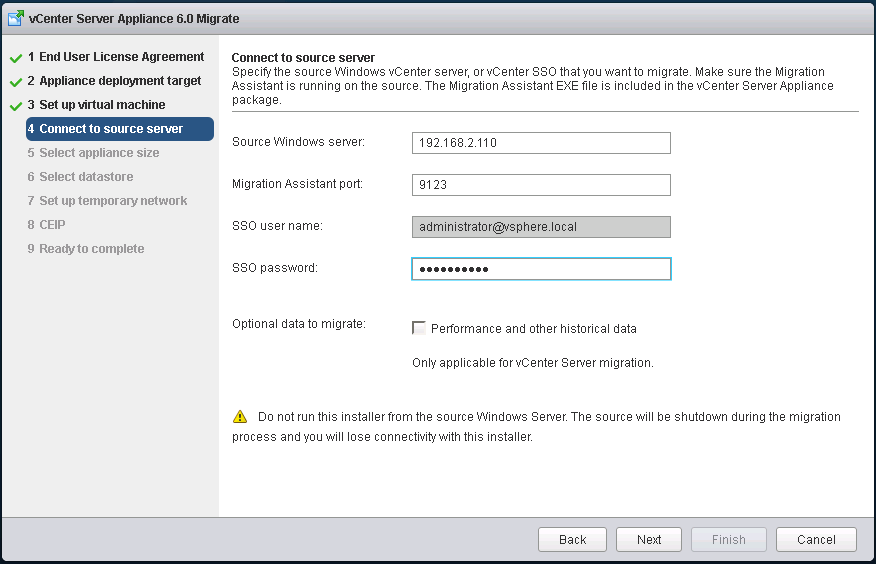
Below Ip would imply details of the source vCenter server, Please provide the IP address/Hostname along with the SSO administrator credentials.
If you need to previous performance historical data, Check the option and proceed further. 9123 port would be default
Click on Next.
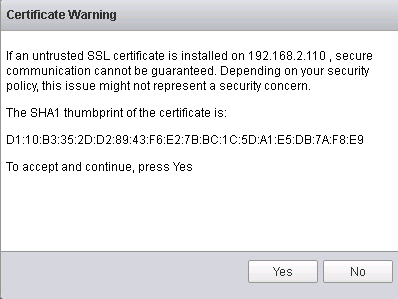
This would ideally be the vCenter certs authenticating. Please click on yes to accept the thumbprint.
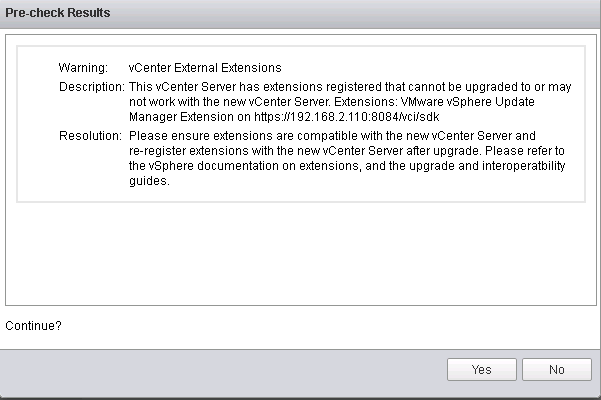
If you have update manager installed on source windows server they may not work. Please ensure you uninstall them prior to the migration and later install it on a different windows box.
Click on Yes.
Details of the domain you want be a member of. Provide the domain administrator credentials and click on Next.

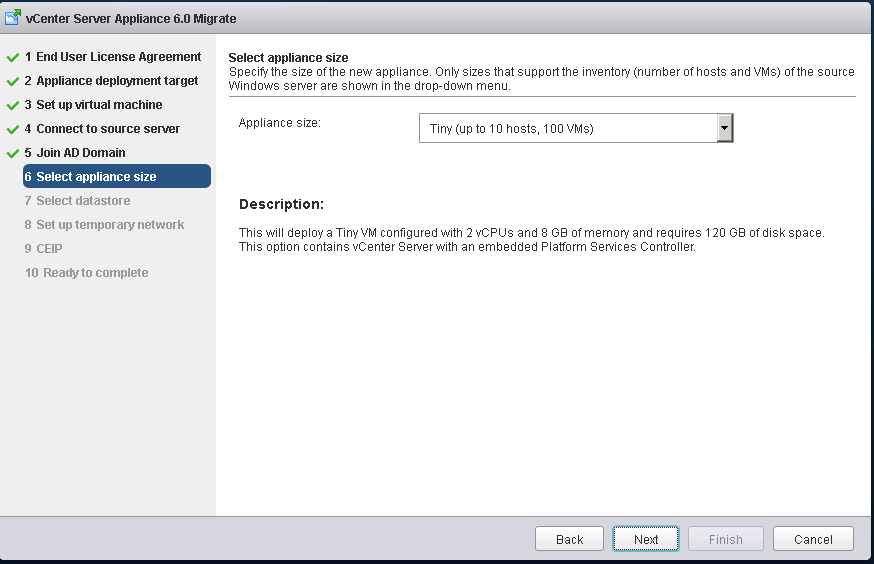
Click on appliance size based on your environment and click Next.
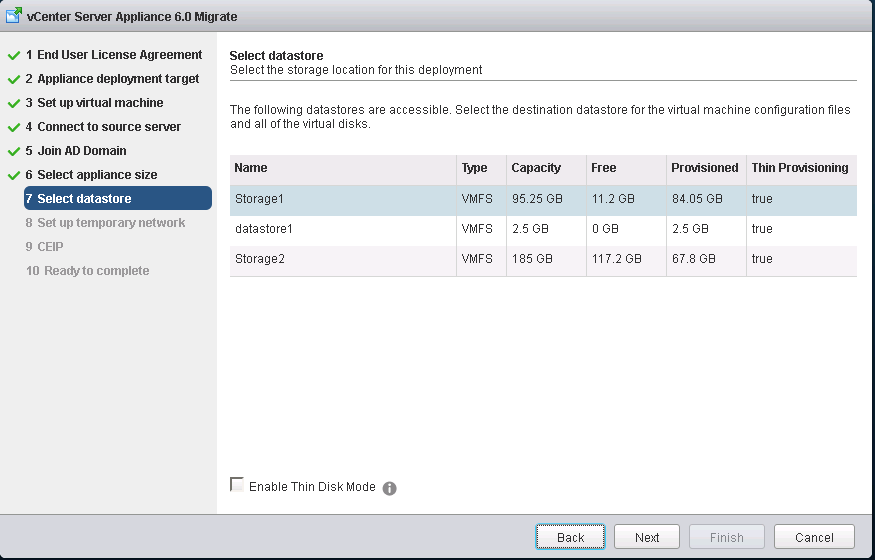
Select the datastore based on the space utilization. The appliance may need 100GB minimum. Click Next.
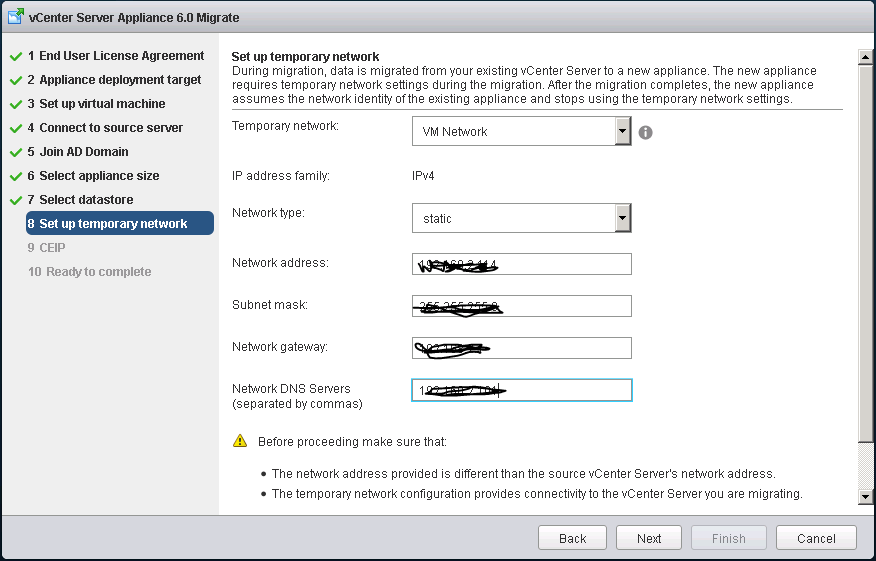
Provide a temporary network information. Ensure the Ip address provided is part of the same subnet where source vCenter is currently residing. Post migration vCenter appliance would fetch the actual source IP.
Click Next.
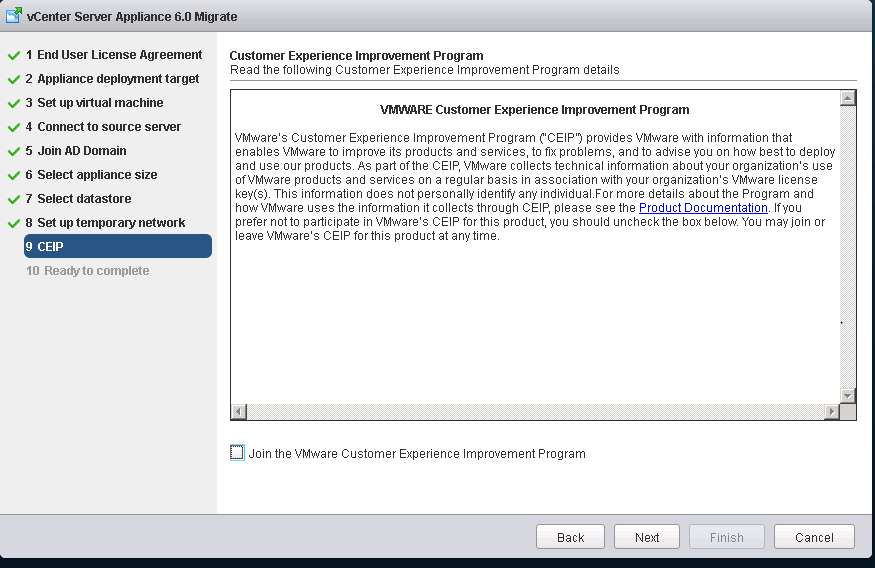
Click Next.
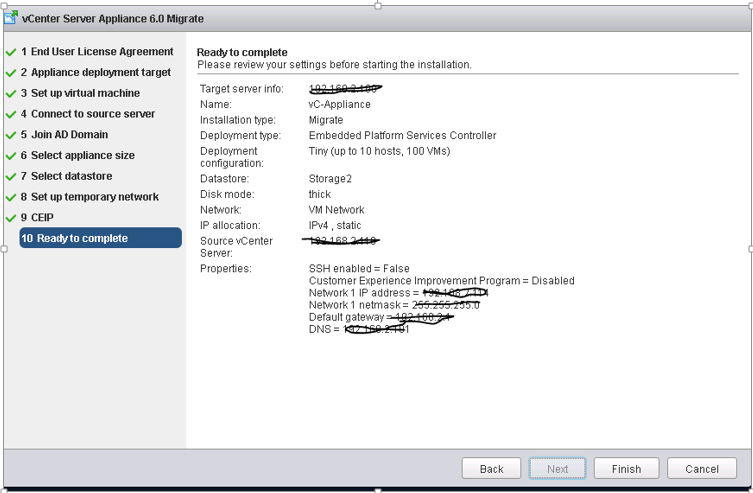
Review all the details before proceeding. Click on Finish.
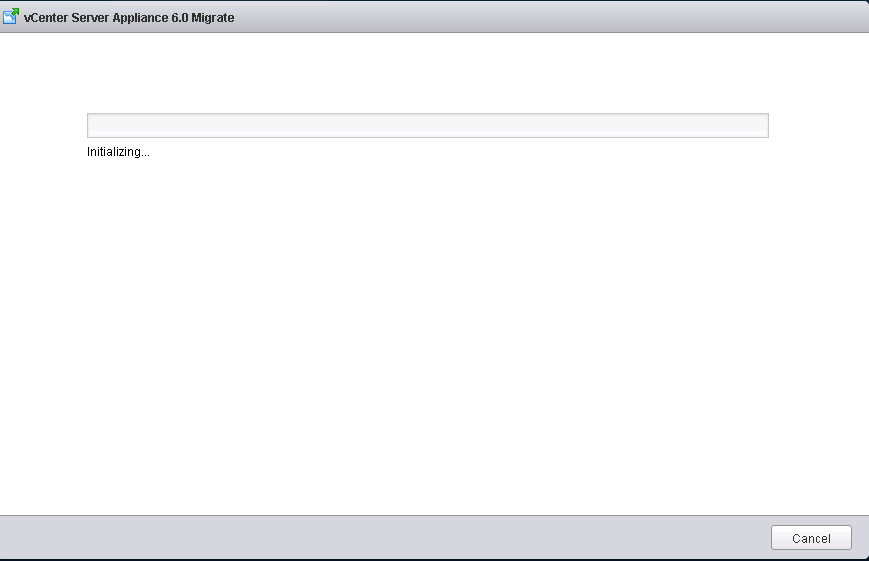
Migration is initializing. This operation my take a while based on the size of your environment.
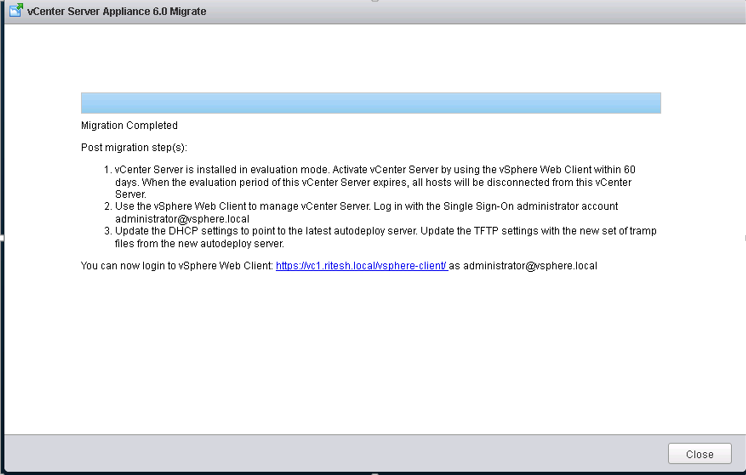
Migration is successfully completed.